 Help Center
KnowledgeBase provides a built-in text Editor to create and edit your articles. The editor allows you to format the text in two ways:
-
Using the toolbar after marking the text
-
Using the toolbar at the top
Using the toolbar after marking the text
In this case, the toolbar appears in your article settings every time you select a fragment of your article.
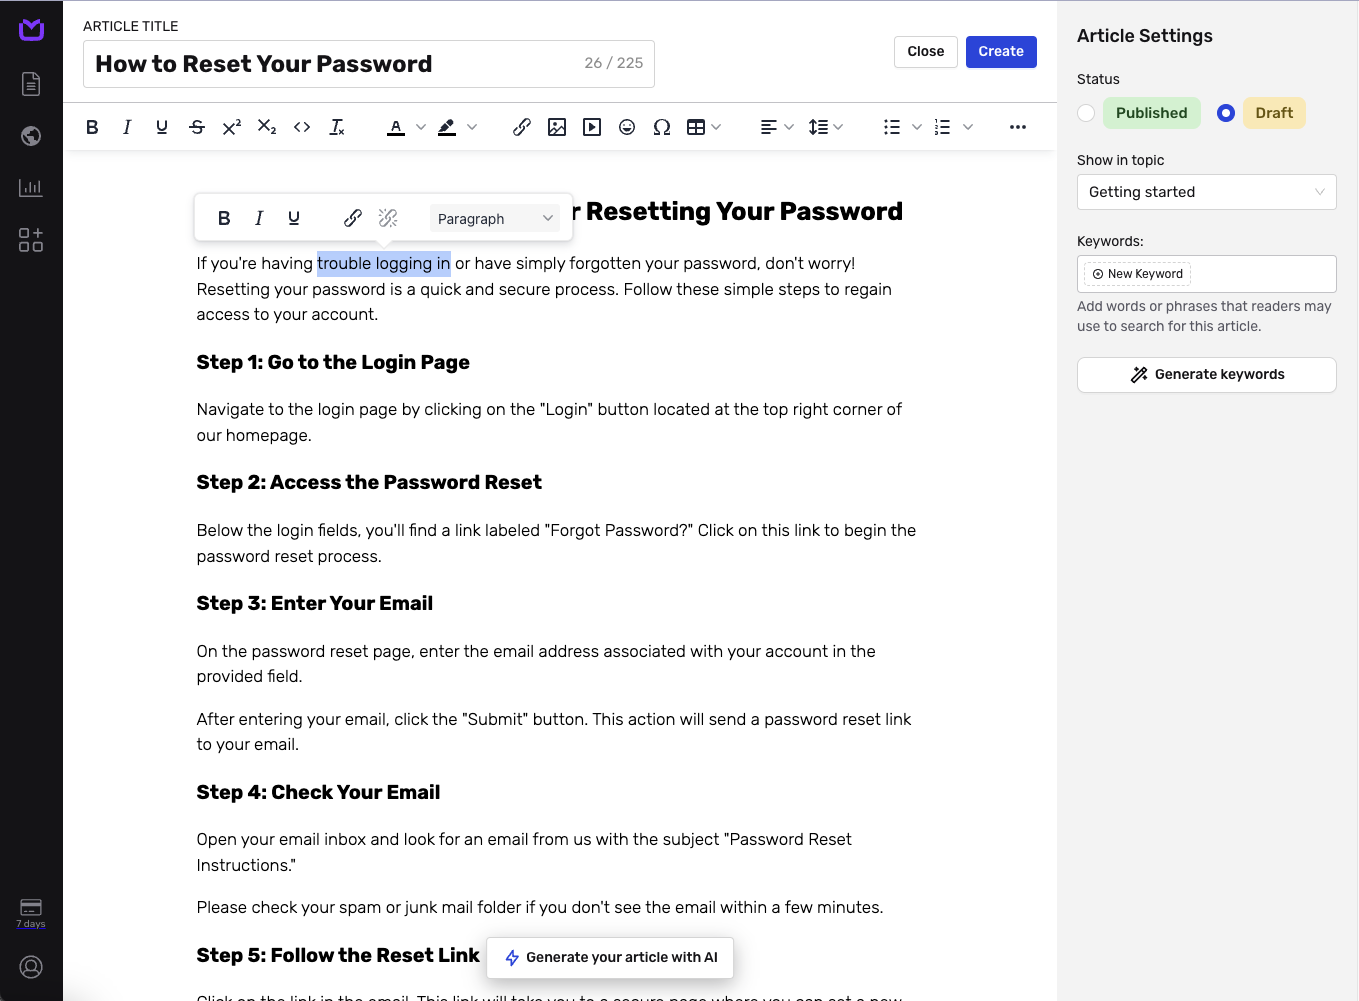
Clicking on different toolbar icons will change the format of the selected text immediately.
To undo the formatting, repeat the process and click again on the same icon.
Using the toolbar at the top
Our new editor allows for more convenient text formatting. With the toolbar options, you can
-
Set headings (H2 and H3).
-
Make the text underlined, italic, or bold.
-
Create ordered and unordered lists.
-
Create a hyperlink.
-
Use a quotation.
-
Create tables.
-
Use colors.
-
Use text alignment.
-
Copy and paste images.
-
Bring in documents from different places.
-
Utilize the HTML editor. Our editor doesn’t support direct HTML pasting. However, if you have HTML articles, you can request an import, and we’ll ensure they’re available for editing in KnowledgeBase.
Use the toolbar at the top to give the text the right formatting and make reading the article fully enjoyable and understandable.
Creating hyperlinks
Hyperlinks allow you to transform a fragment of text into a clickable link.
You can create a hyperlink with a "link" icon in the editor’s toolbar.
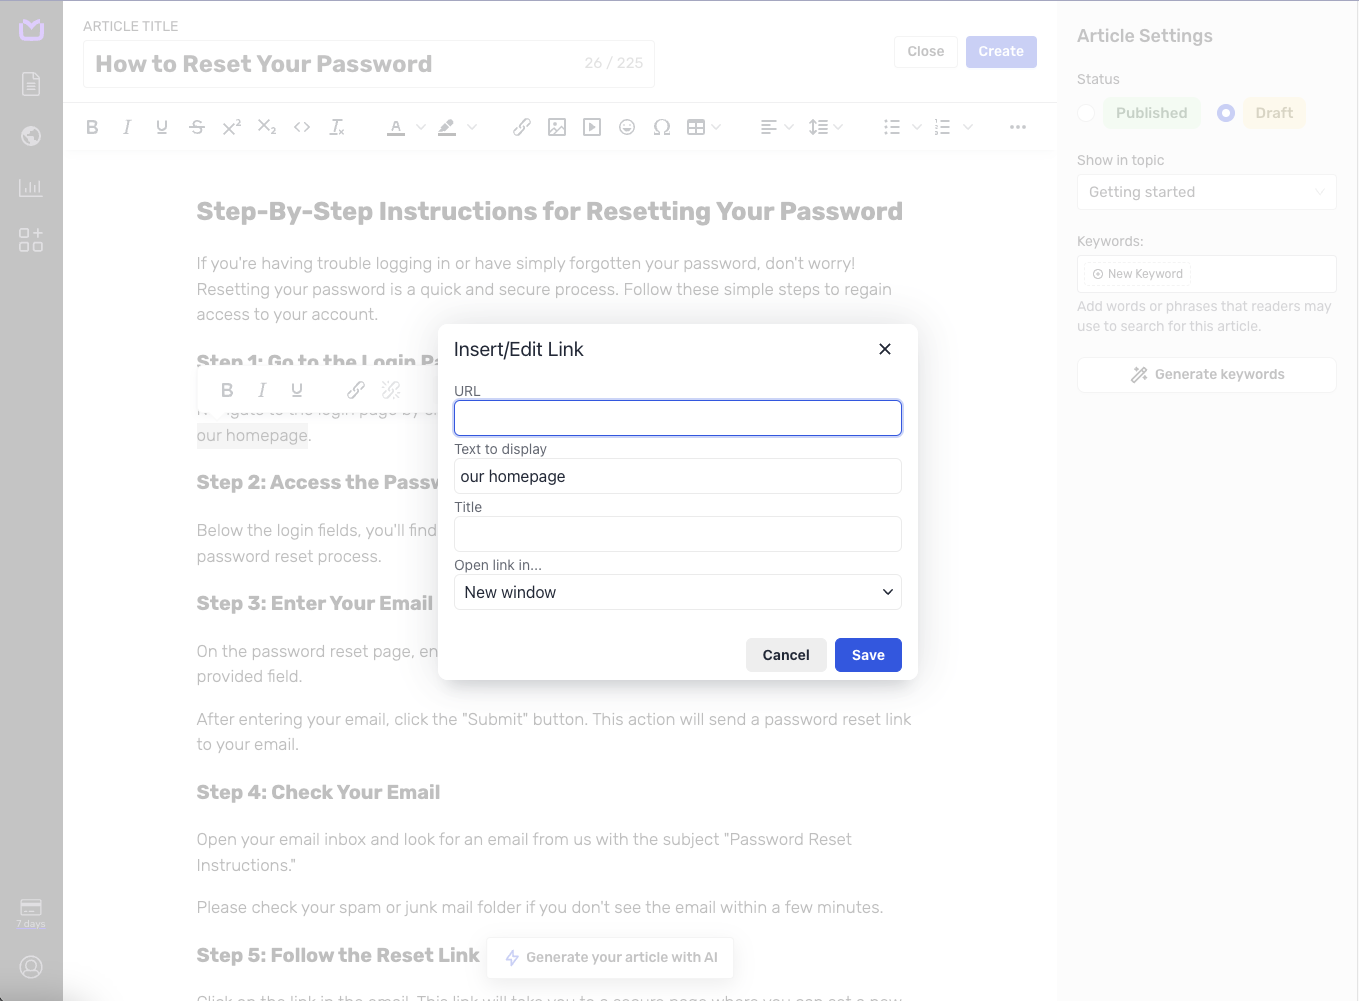
A URL input text area will appear after you click the button – paste your link there and submit it with "Save."
That’s all – you’ve added a working hyperlink. Go to your KnowledgeBase Widget or Public Help Center and try it out.
If you want to delete or change the link, select the hyperlink and click again on the "link" icon – it'll delete the hyperlink so you can create a new one.
Currently, the only way to preview the link in the editor is with the right mouse button → open in a new tab.
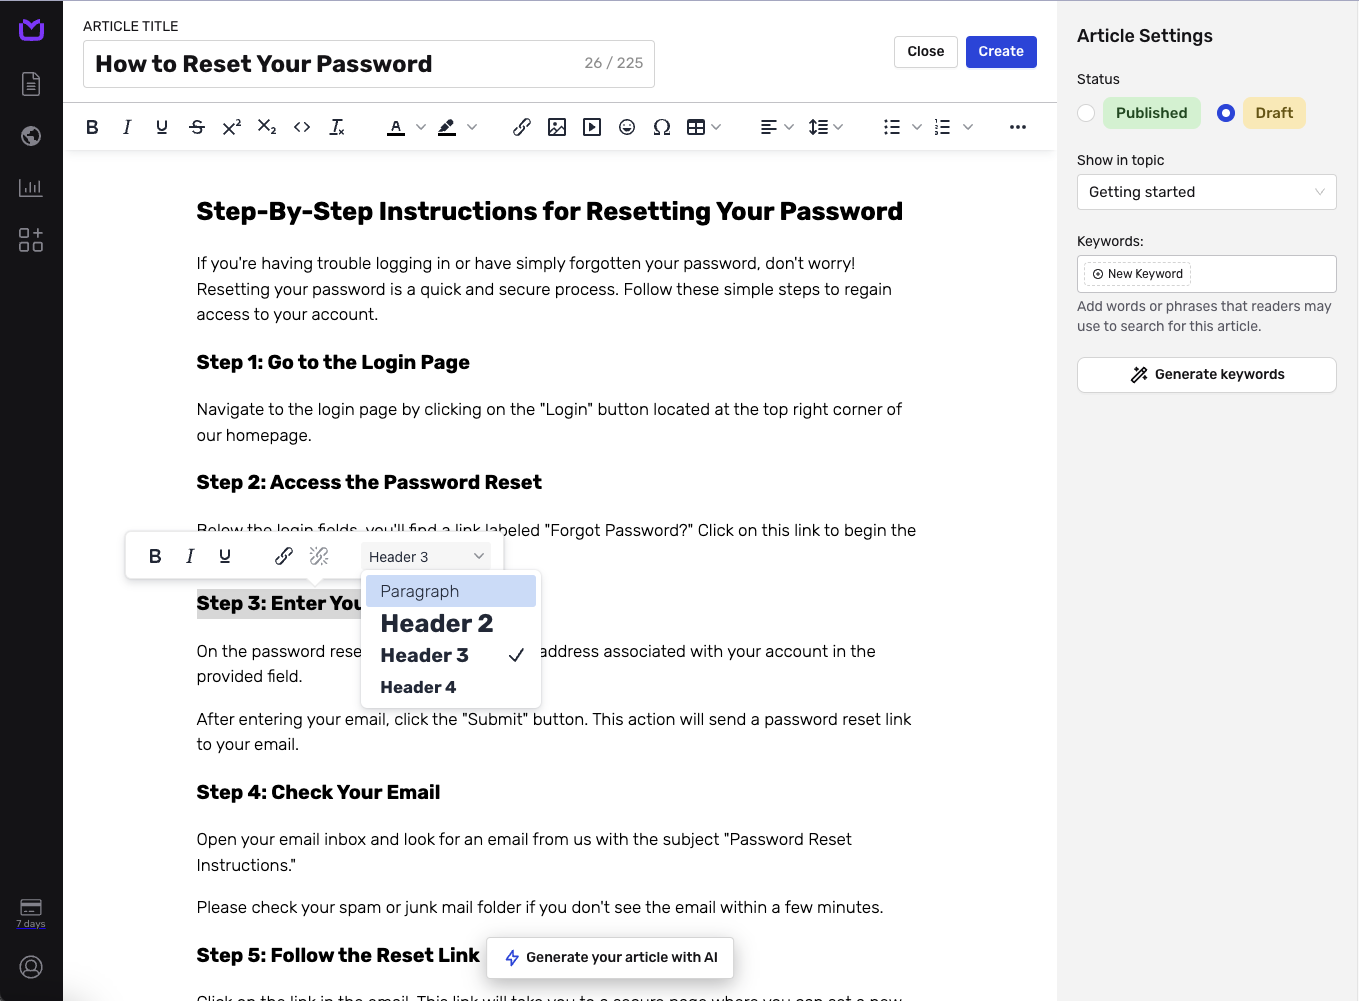
Using headings
To highlight the main sections of your help articles, split them with headings.
KnowledgeBase supports all sizes of headings (1-4).
Select the corresponding Hx icon on the editor's toolbar to format text with headings.
Making text bold
To make text bolder, select a fragment of text and click the "B" icon.
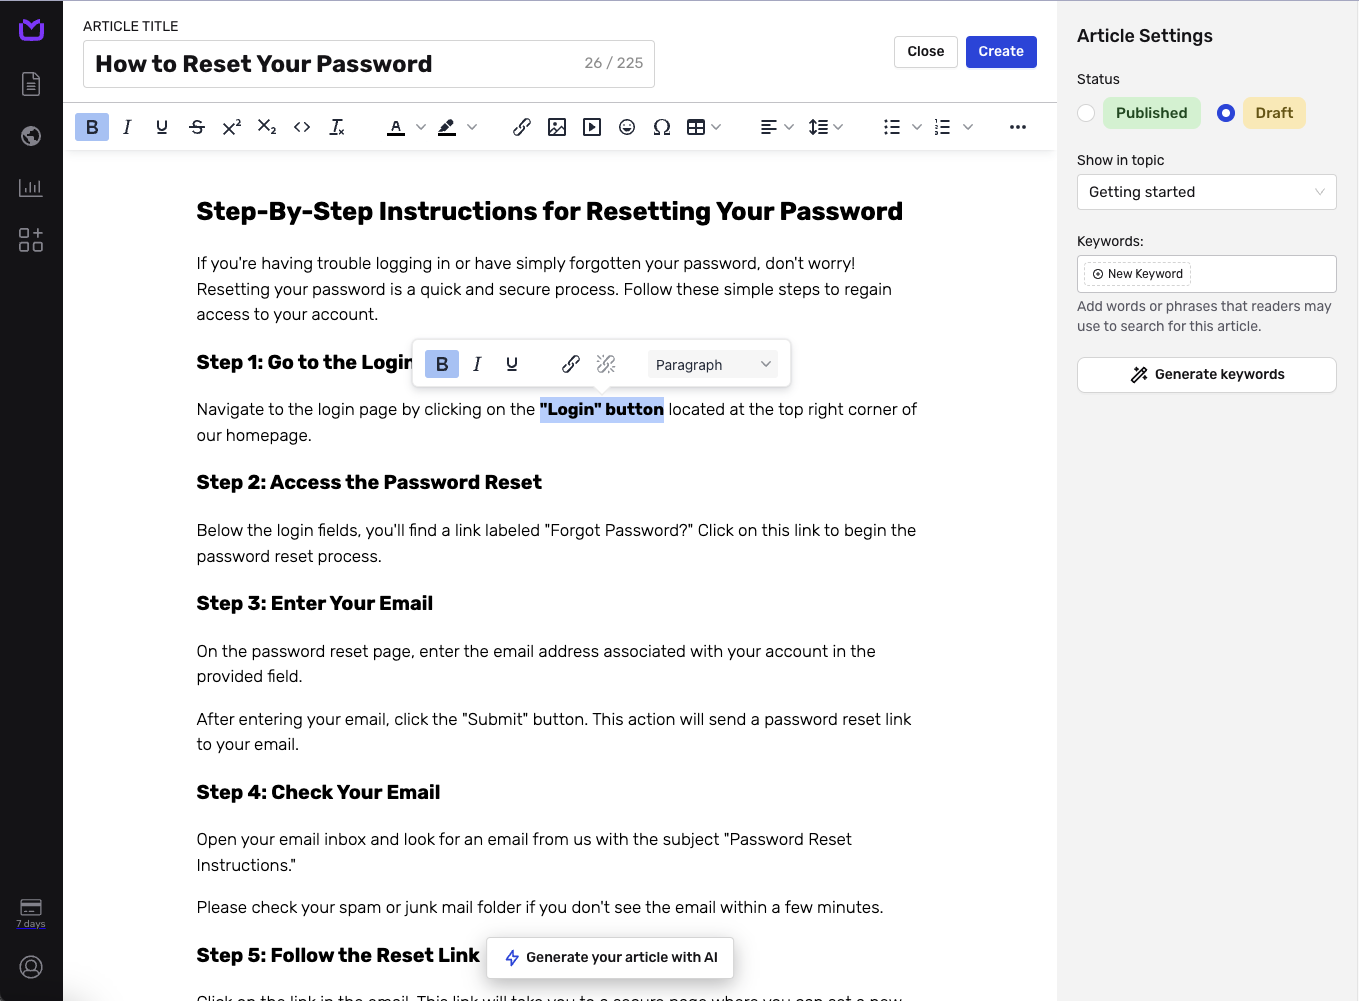
To undo the action, repeat the process – clicking again on the active icon will disable the effect.
Making text italic
To make text italic, select a fragment of a text and click the "I" icon.
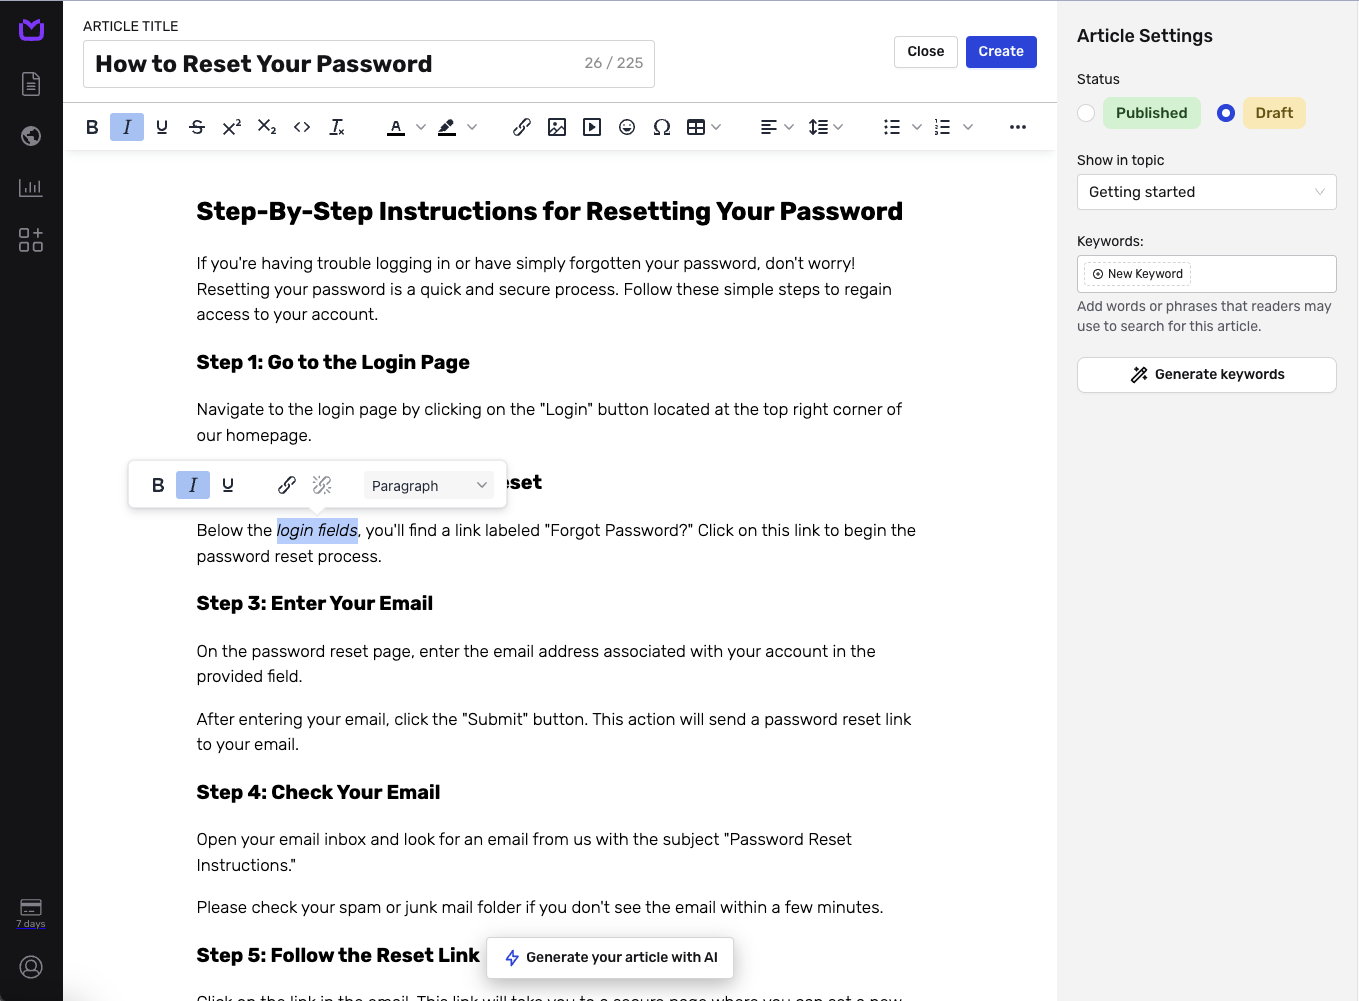
To undo the action, repeat the process – clicking again on the active icon will disable the effect.
Making text underlined
To make text underlined, select a fragment of text and click the "U" icon.
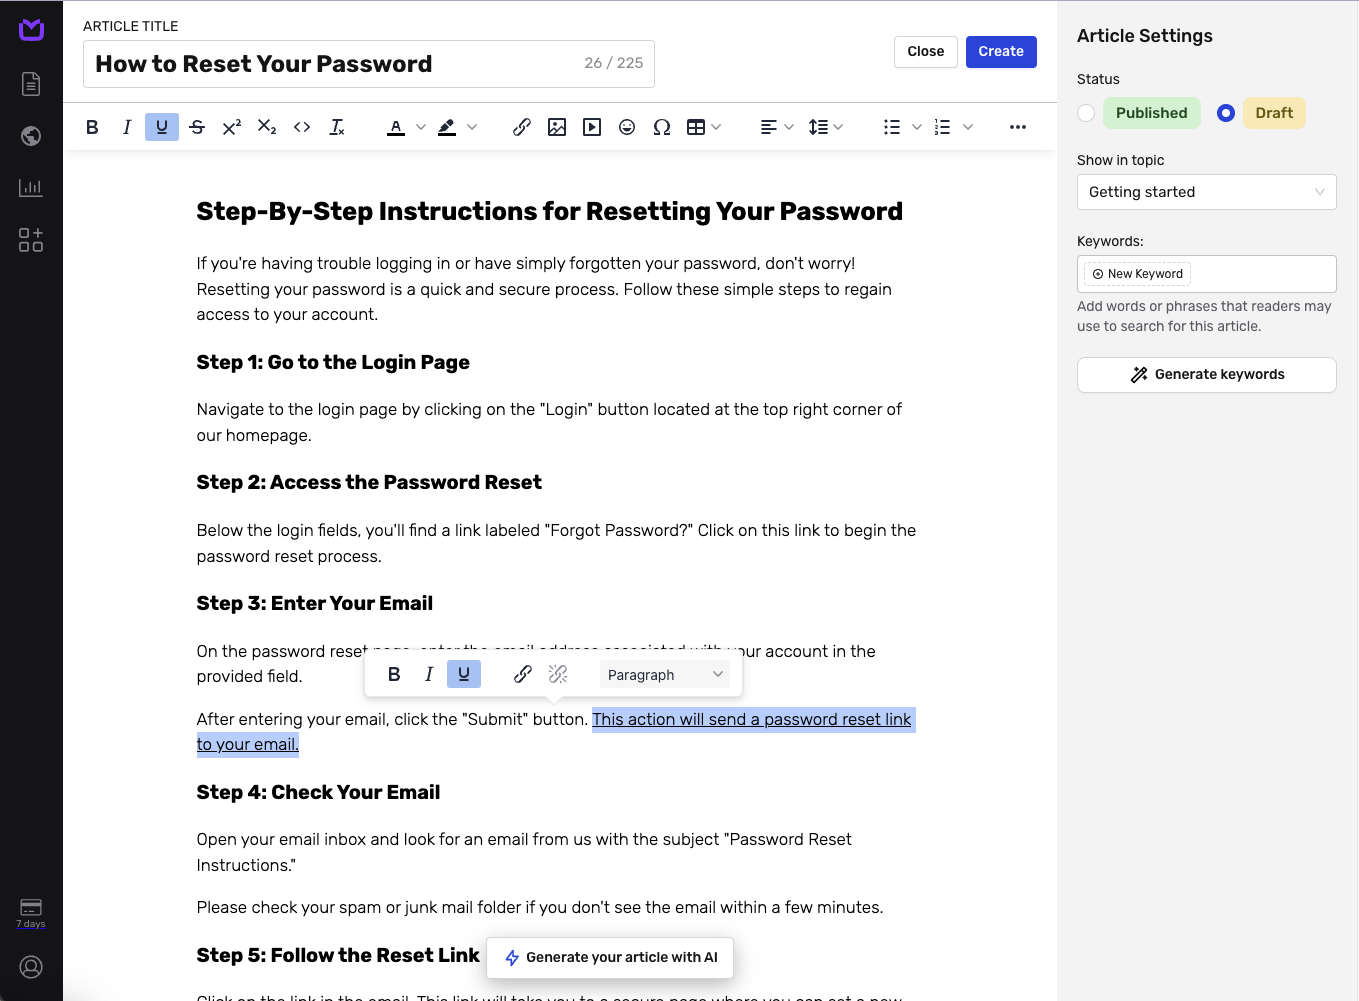
To undo the action, repeat the process – clicking again on the active icon will disable the effect.
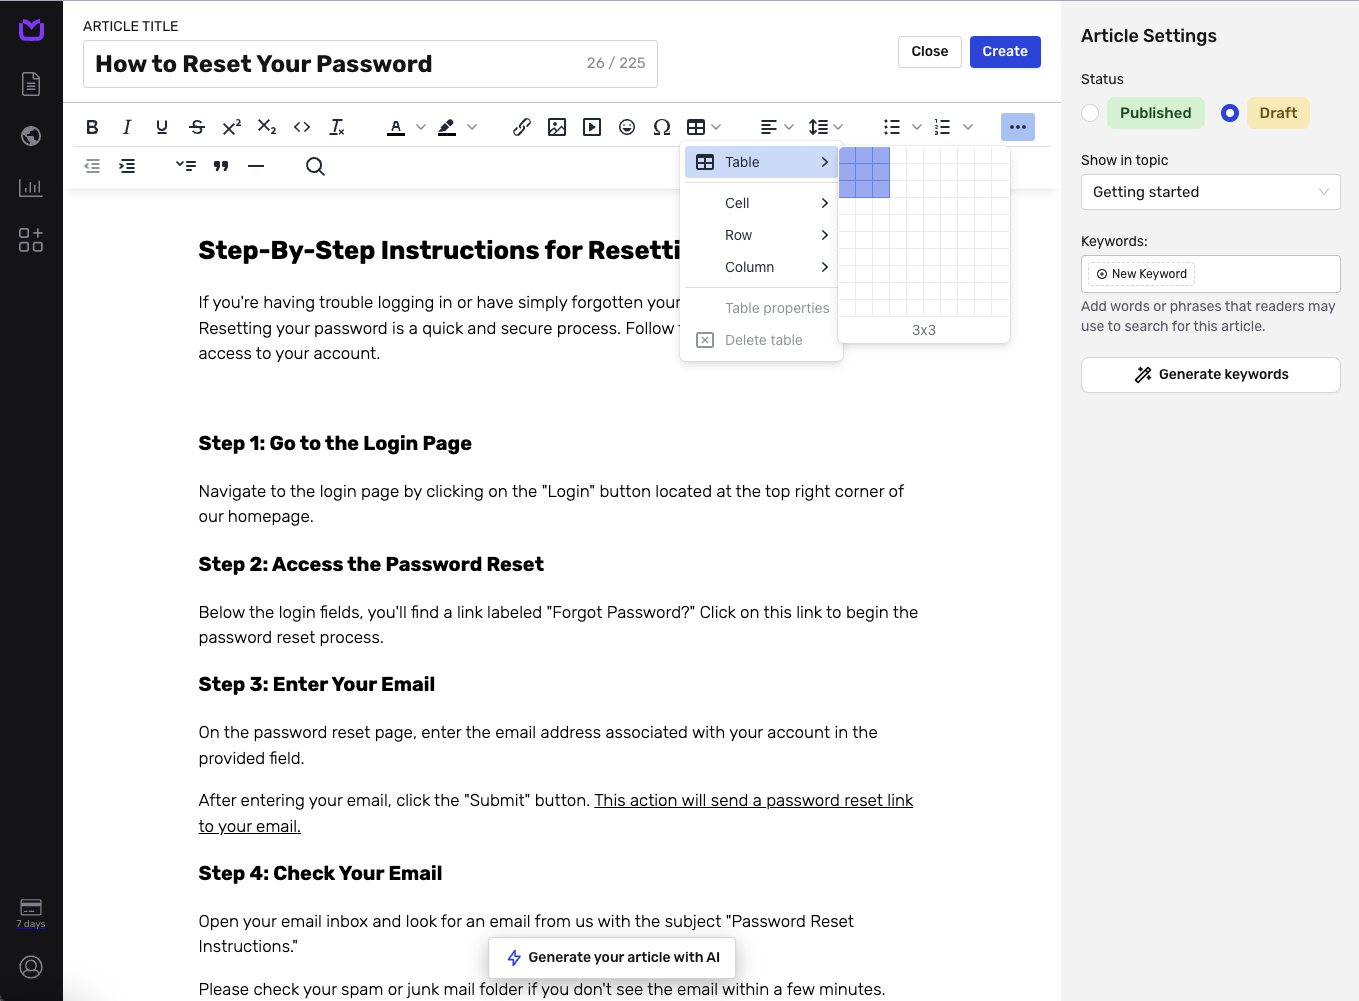
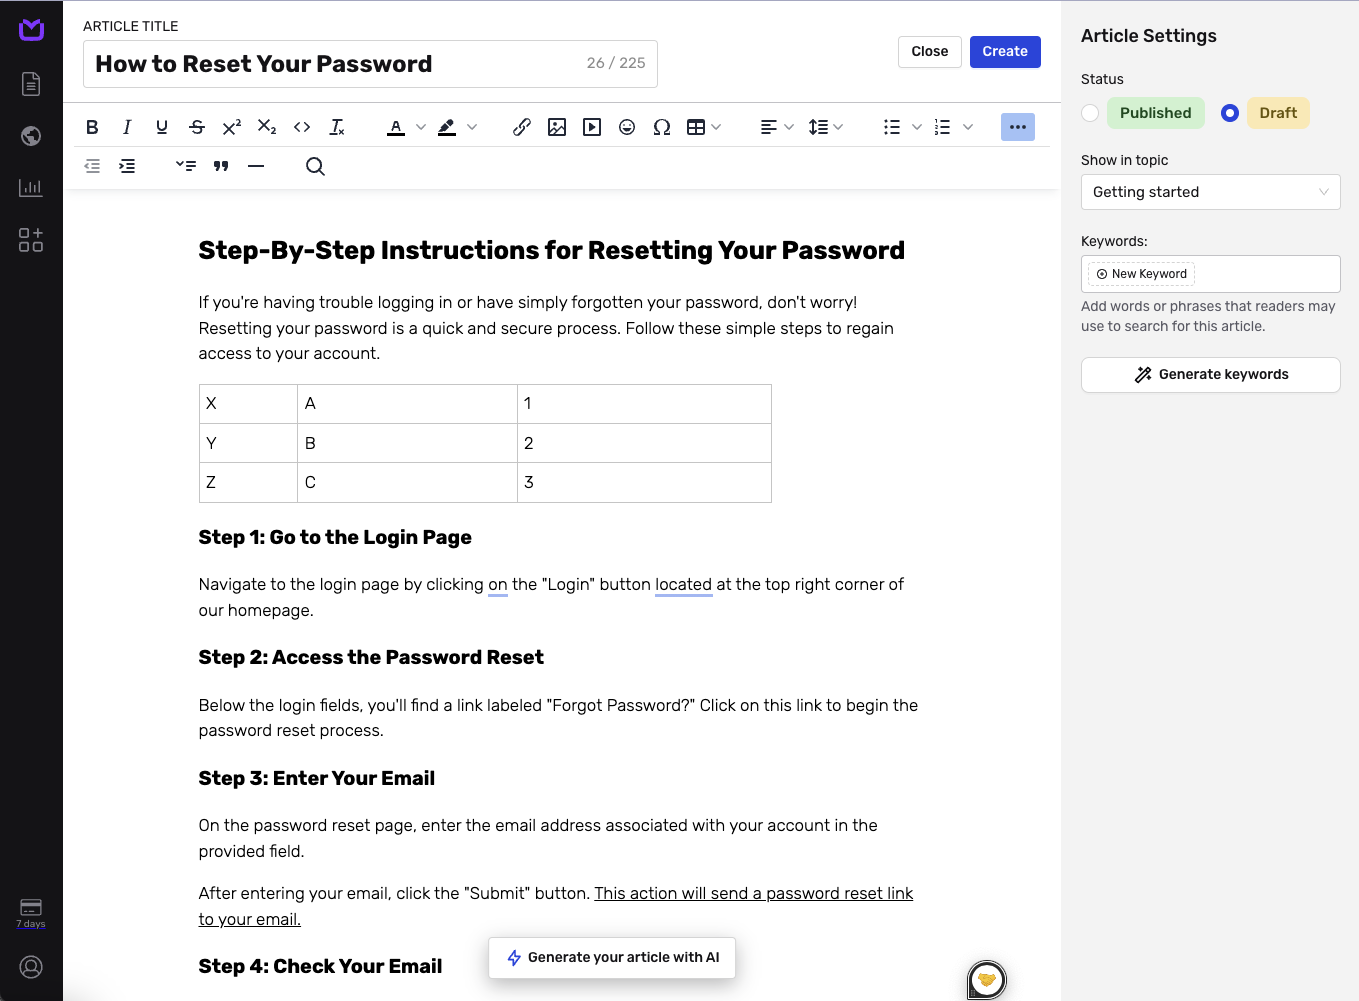
Creating tables
KnowledgeBase lets you create tables. Before creating a table, determine what information it will contain and how it will be useful to the KB users. Is it for comparison, summarizing information, or detailing specifications?
Then, click on the "table" icon and decide on the number of columns and rows.
Each column should represent a specific category of information, and each row should represent a single item within that category.
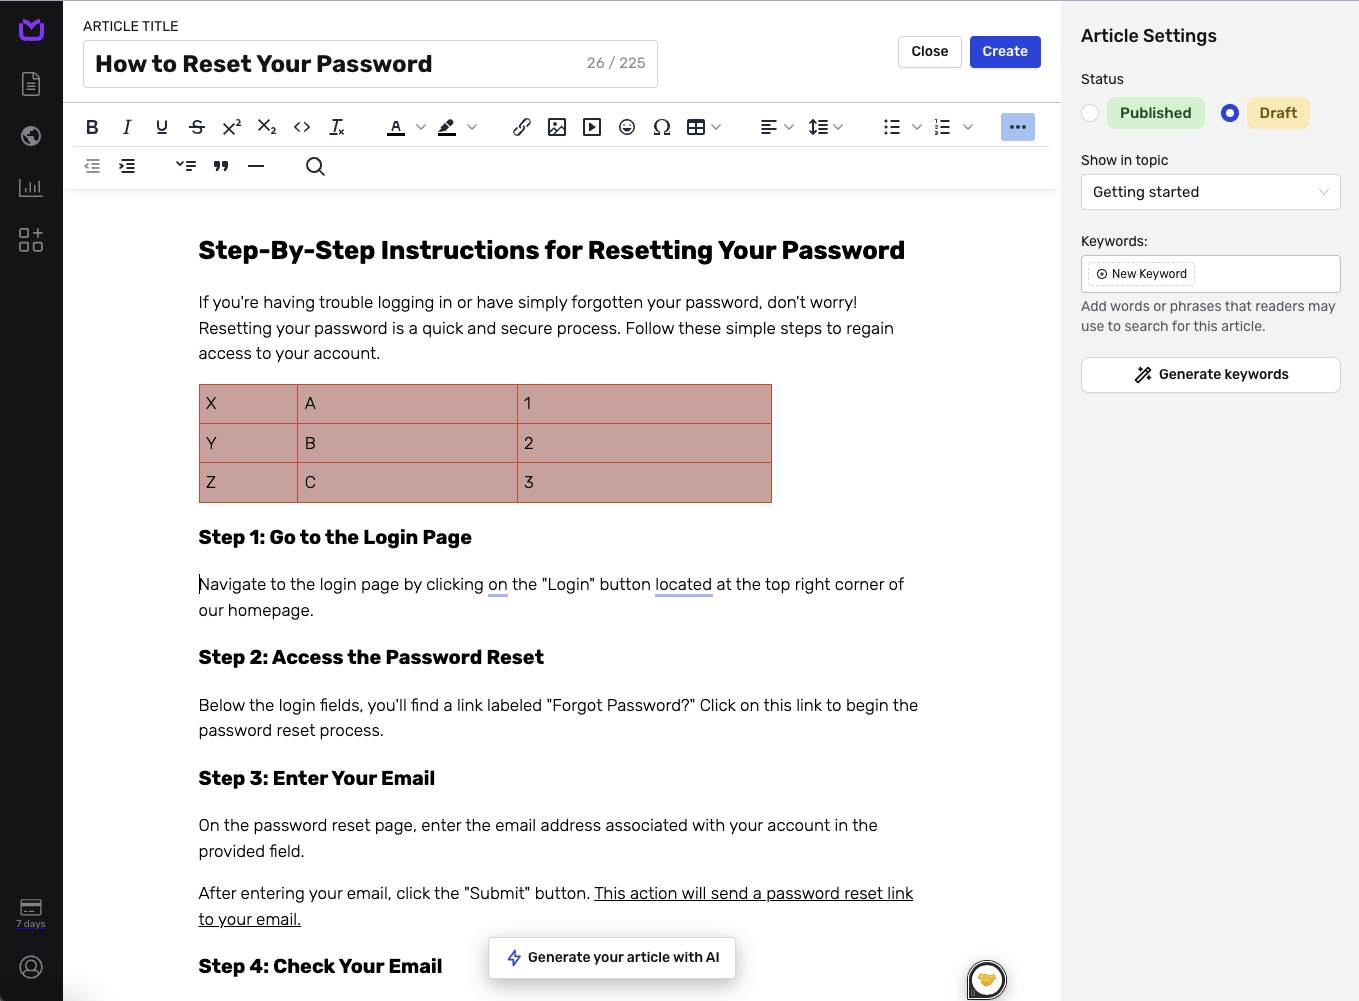
Start filling in the table with the necessary information. Ensure accuracy and clarity to prevent confusion. Use concise and precise language for table content.
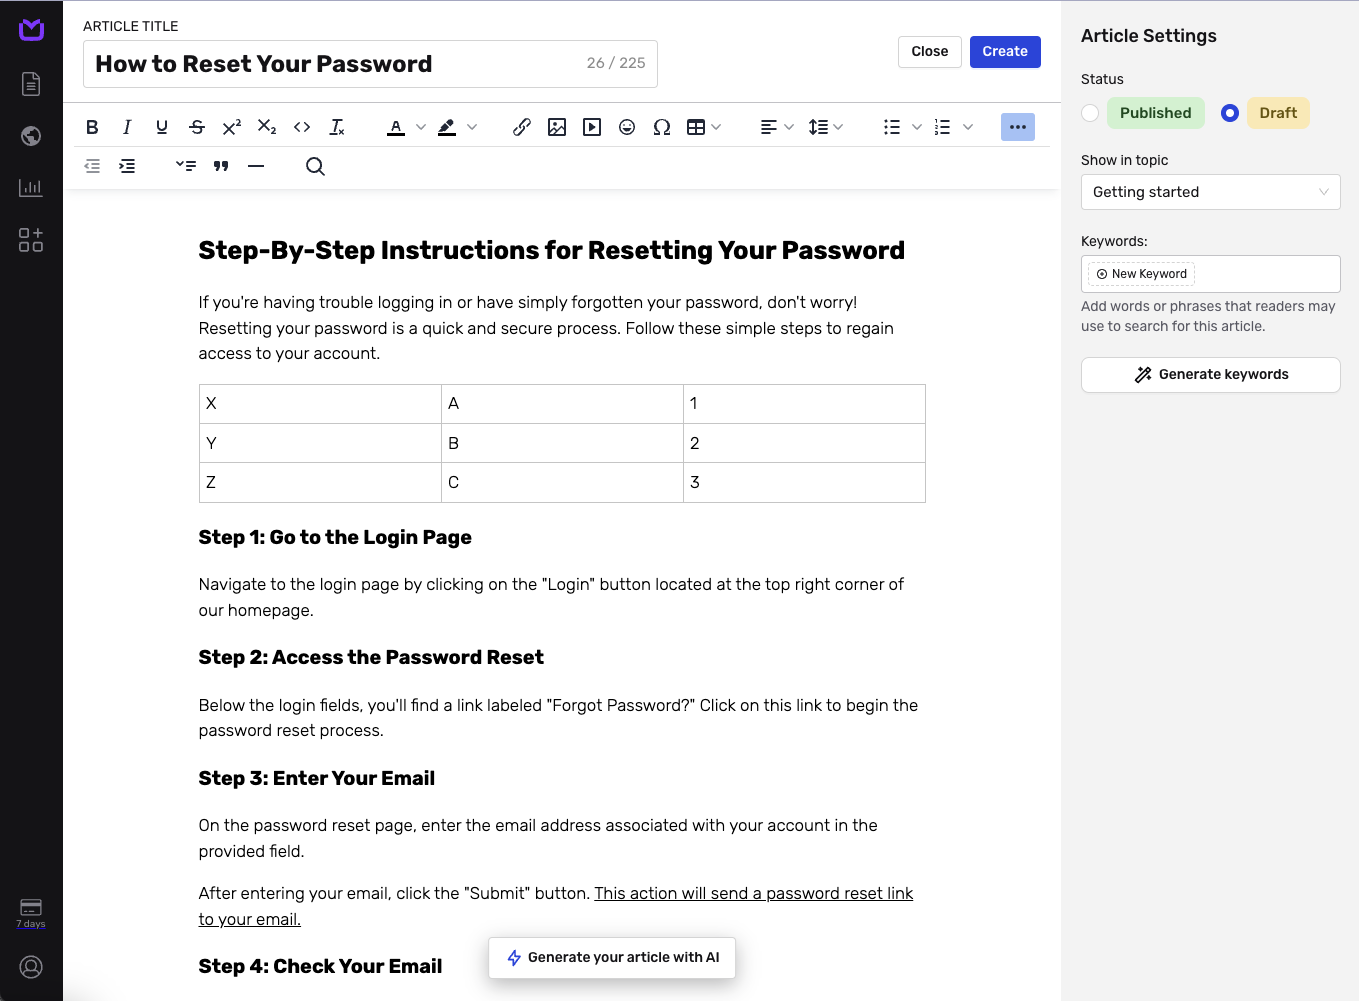
Adjust the columns' width and the rows' height to make the content readable.
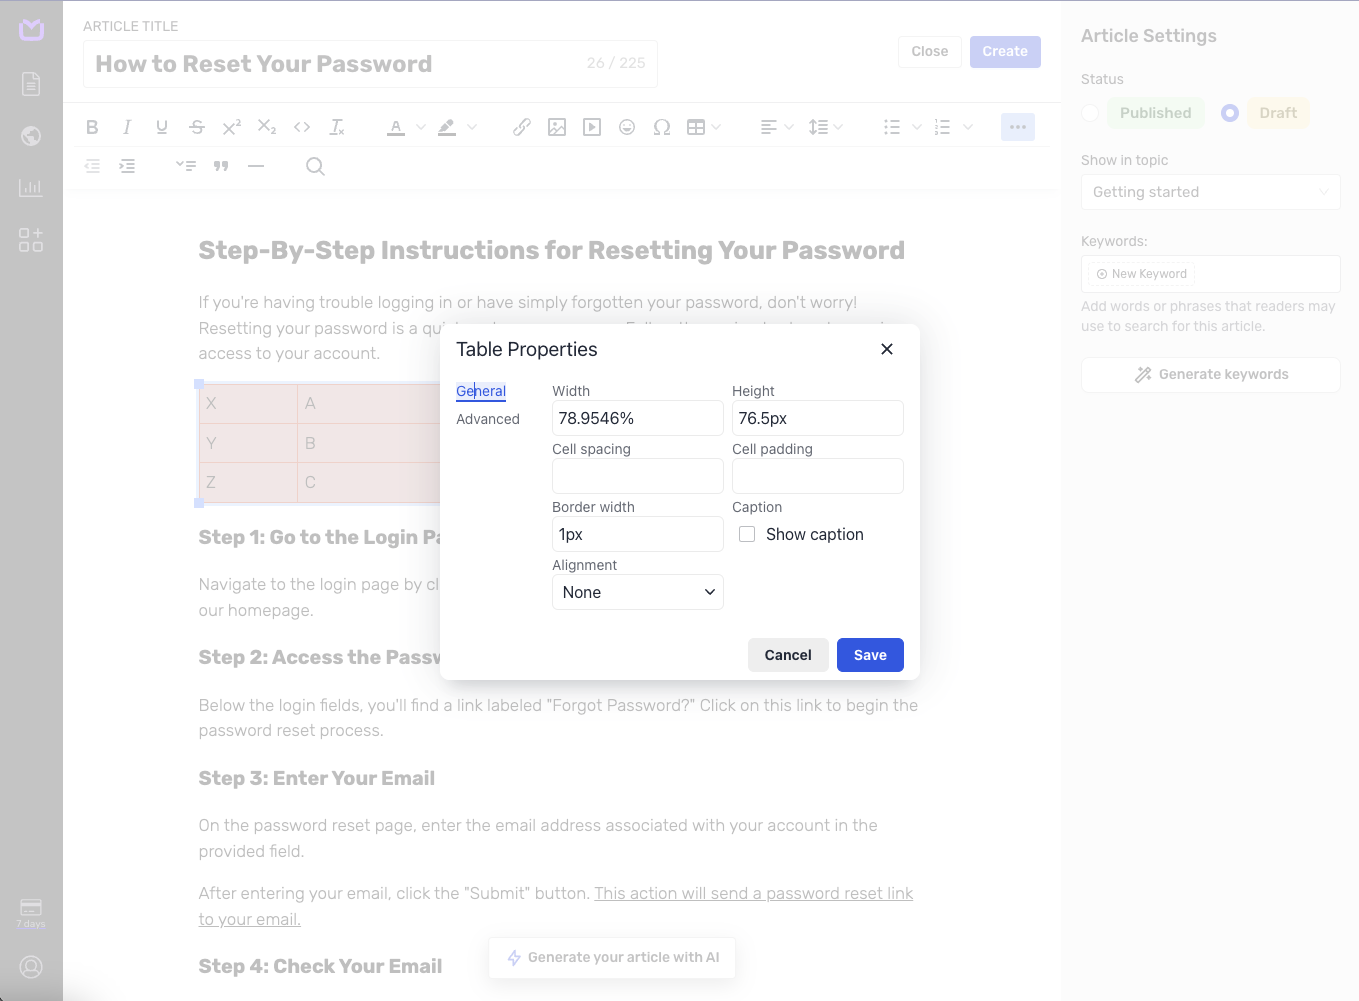
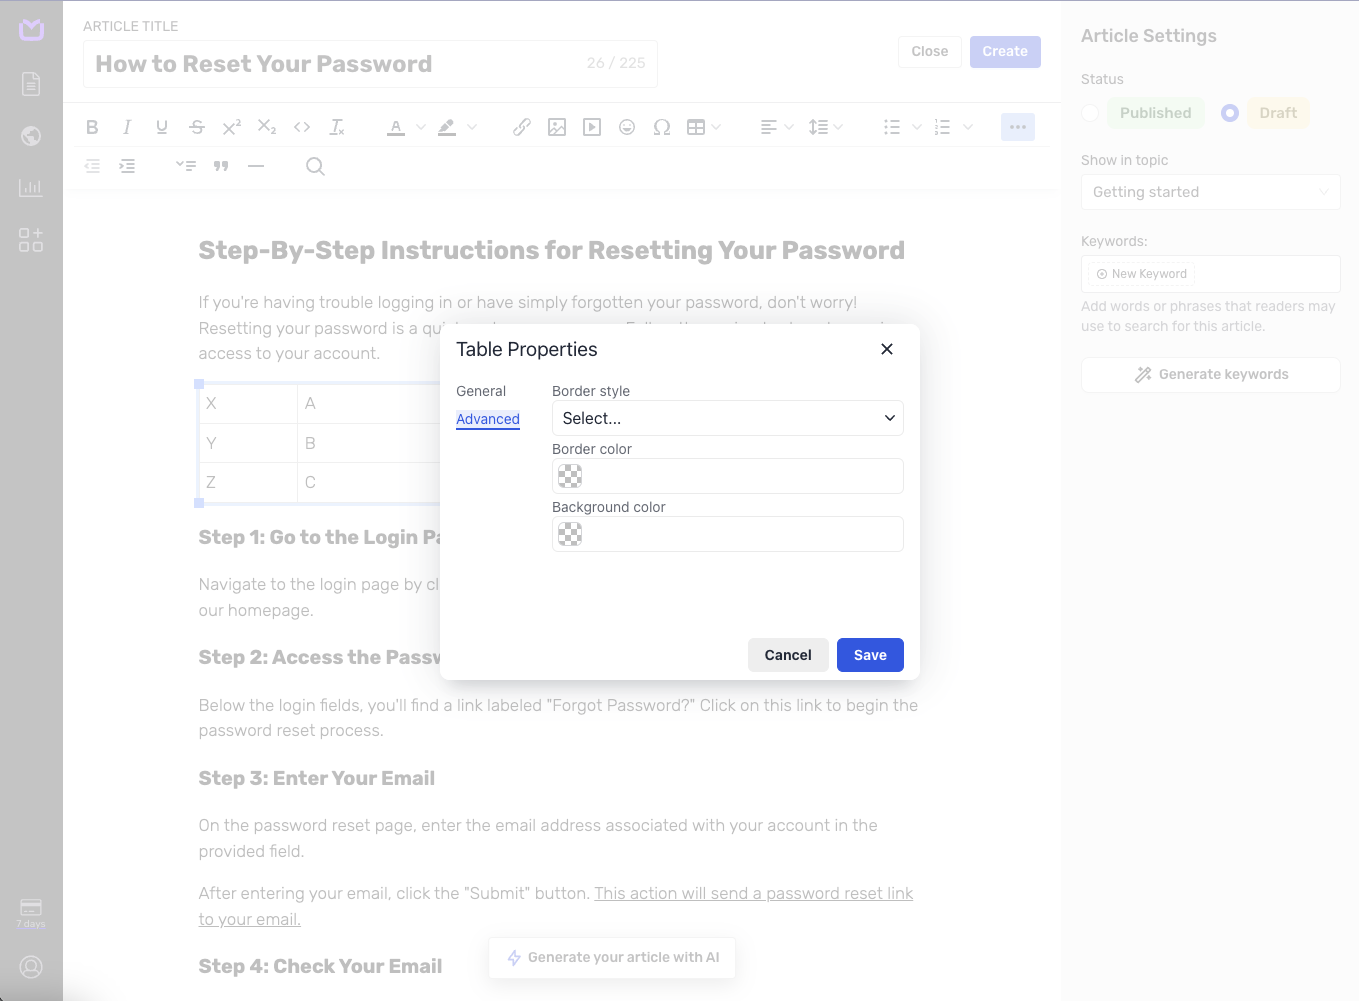
Adjust the table properties to your needs using general and advanced options.
Change the main table features related to width, height, border, spacing, padding, caption, or alignment in the general table properties settings.
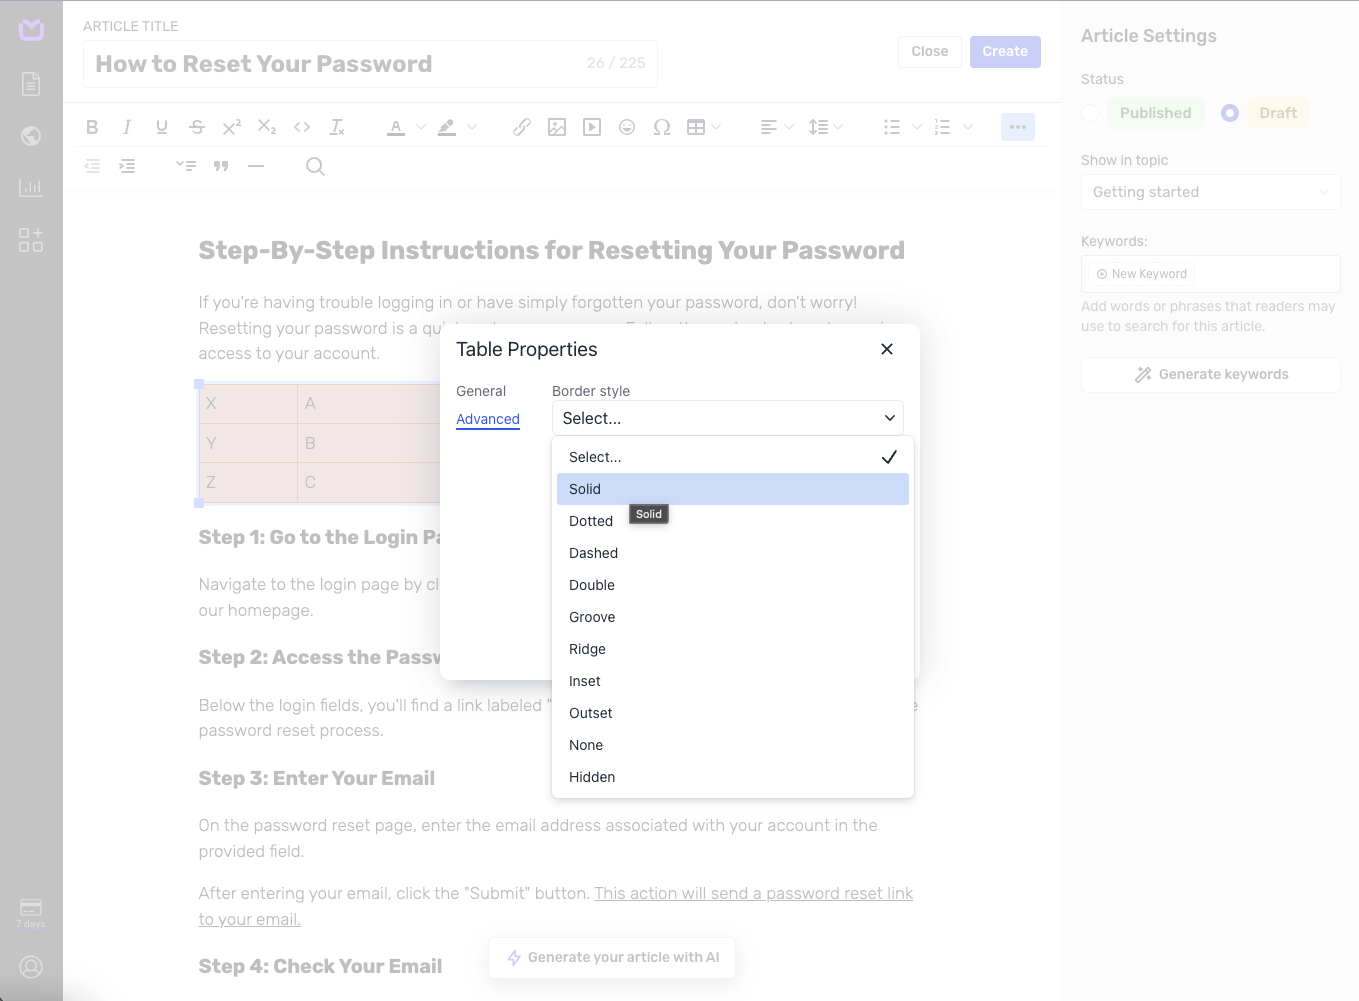
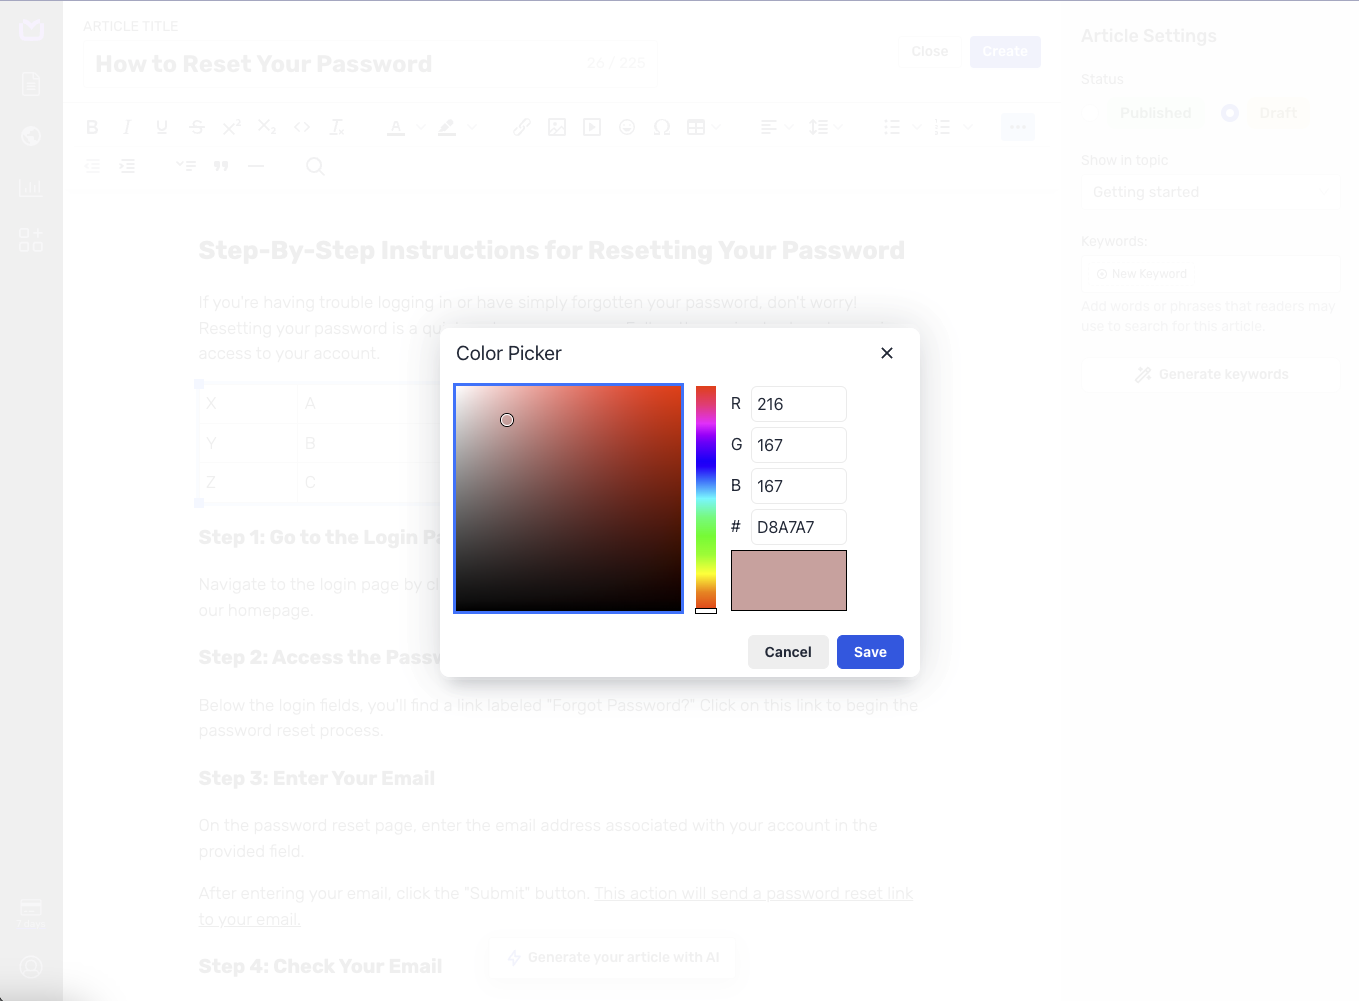
Also, think of using border style, as well as colors for borders and the background to make the table more distinct. You can do this by configuring the advanced table properties settings.
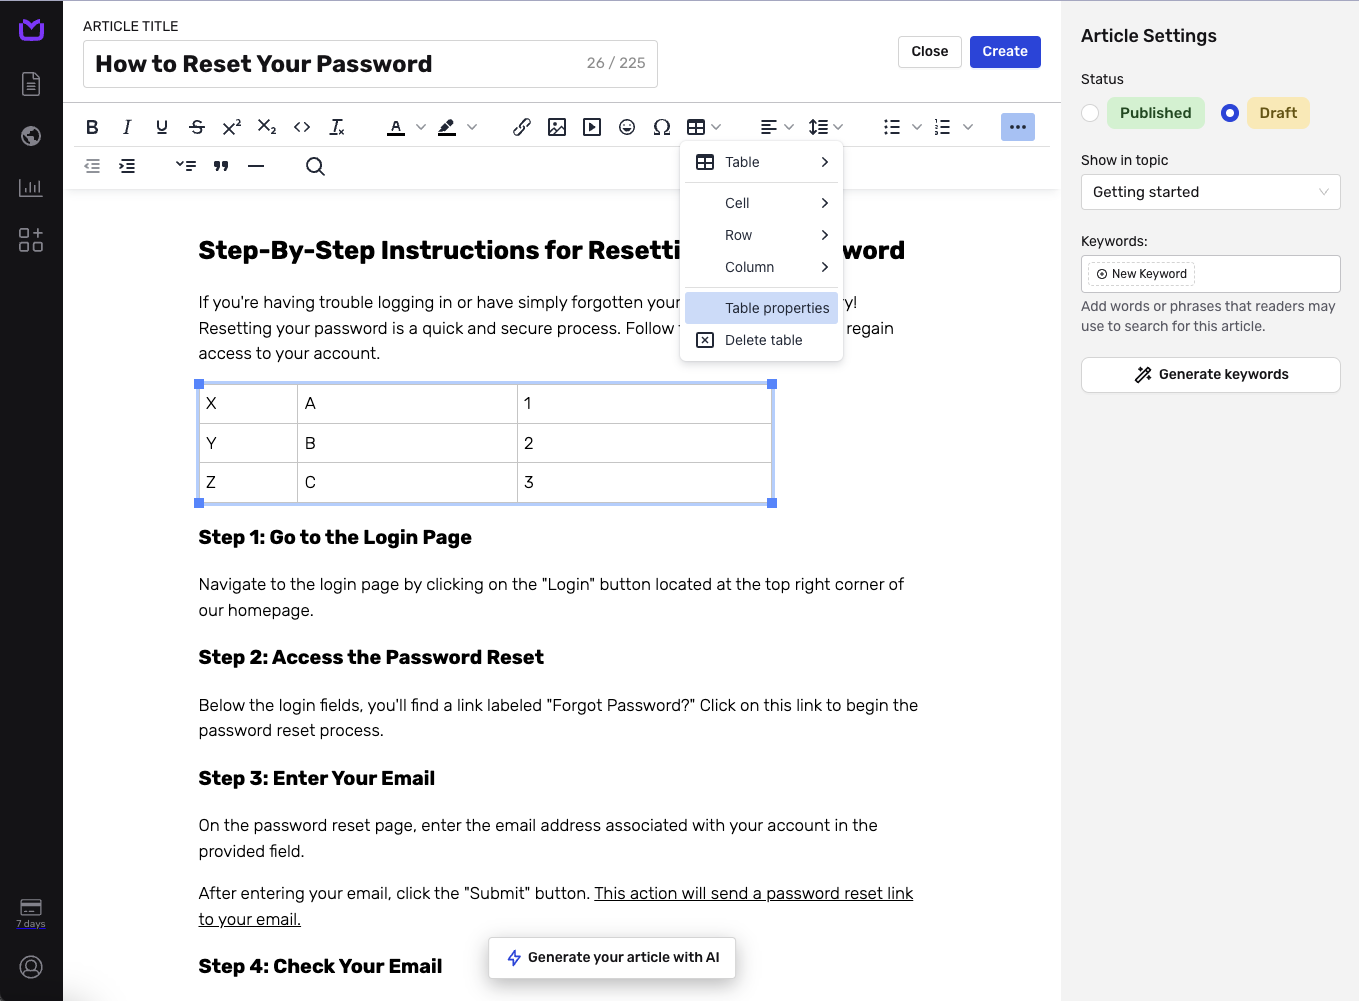
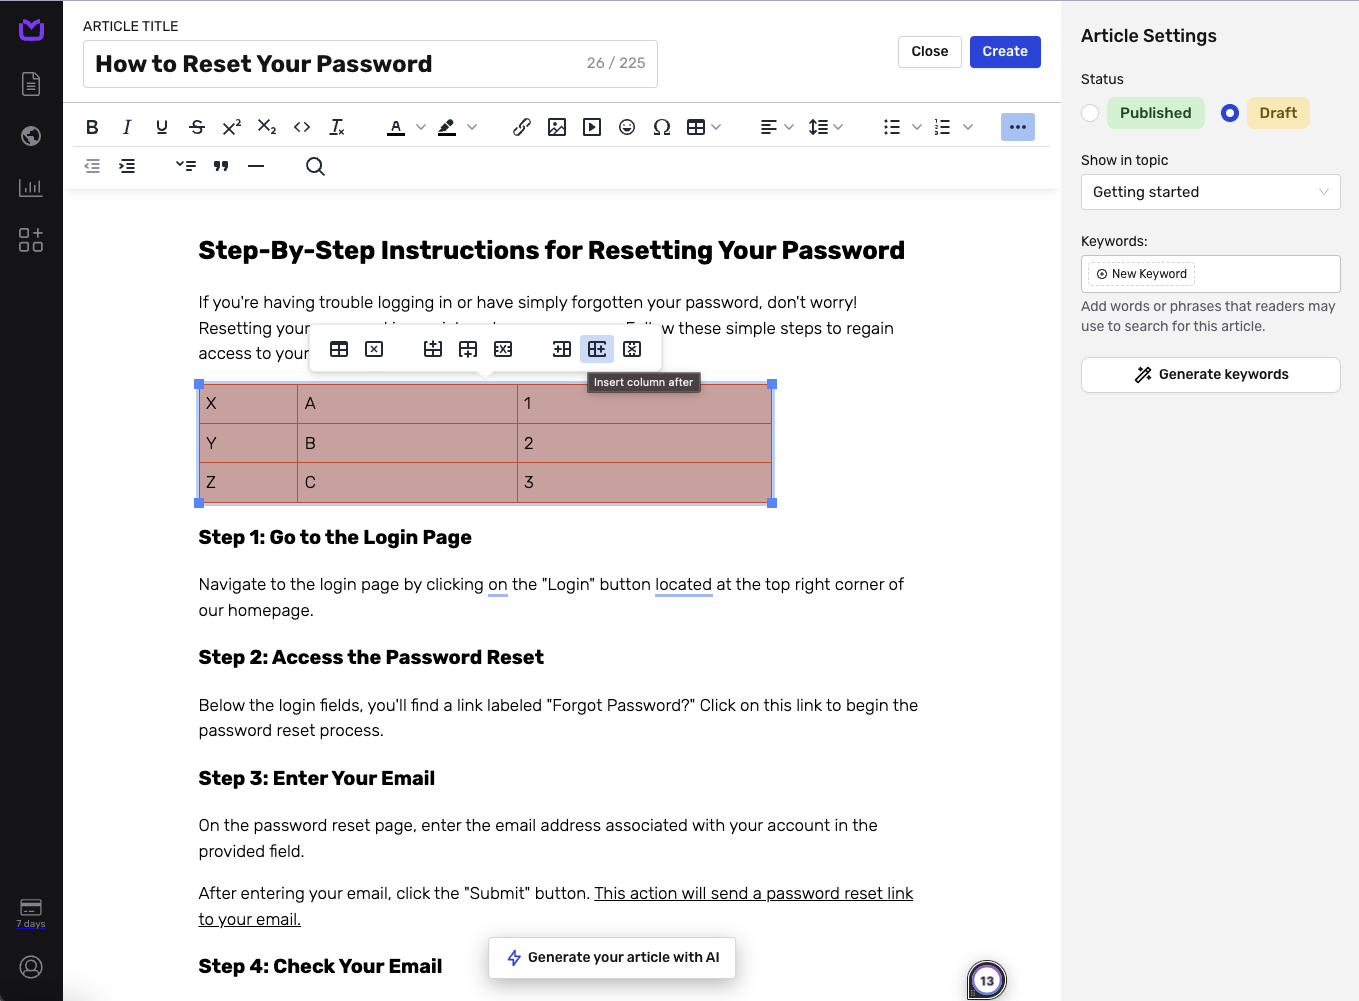
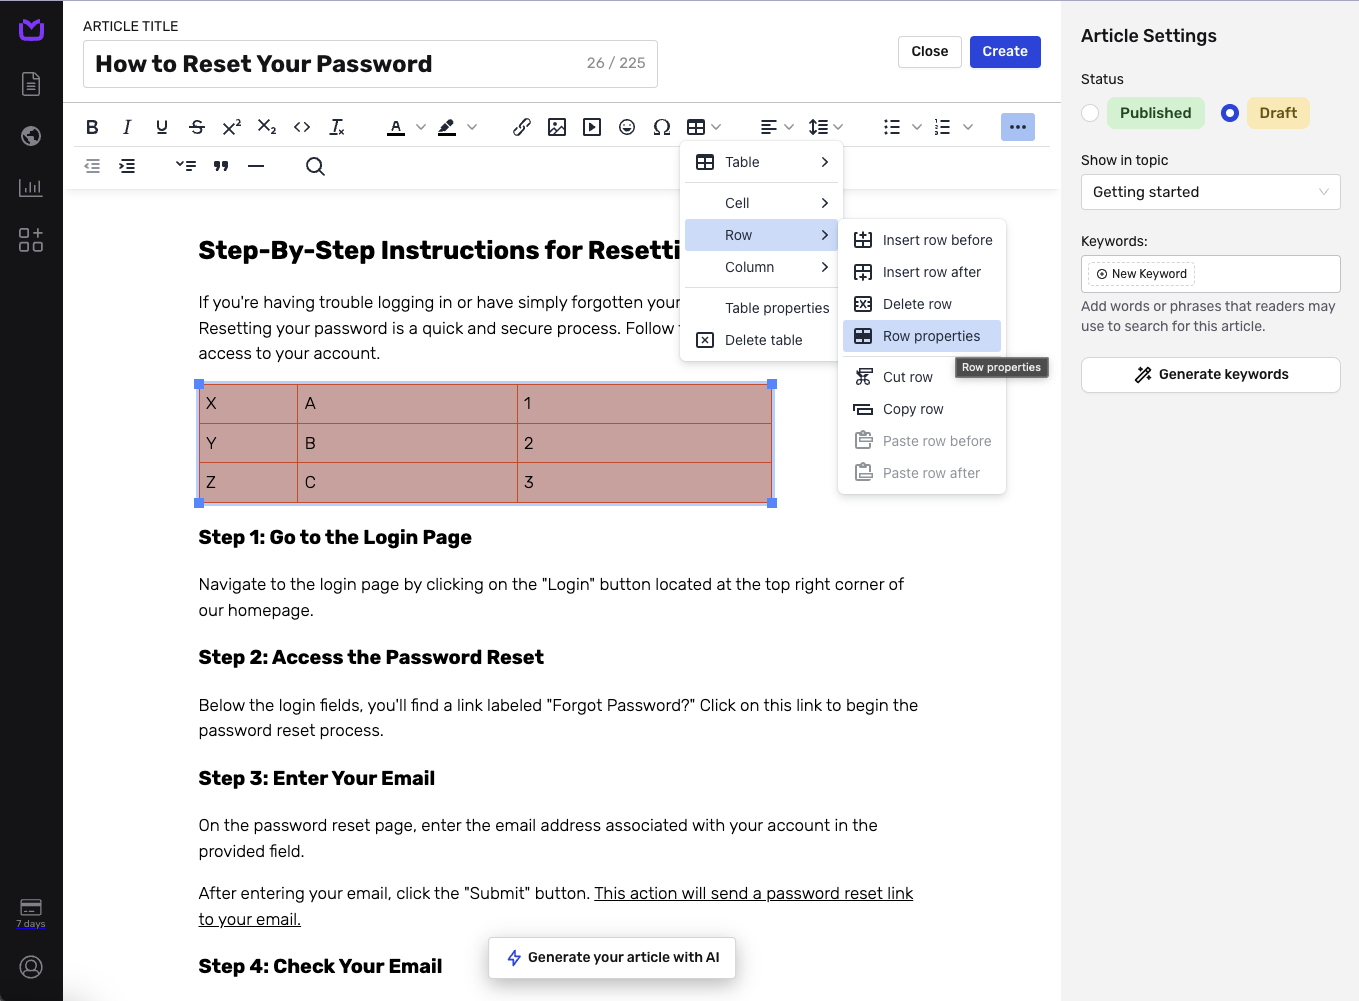
If, at some point, you decide you need more columns or rows, you can easily add them by clicking the appropriate icon on the toolbar after selecting the table.
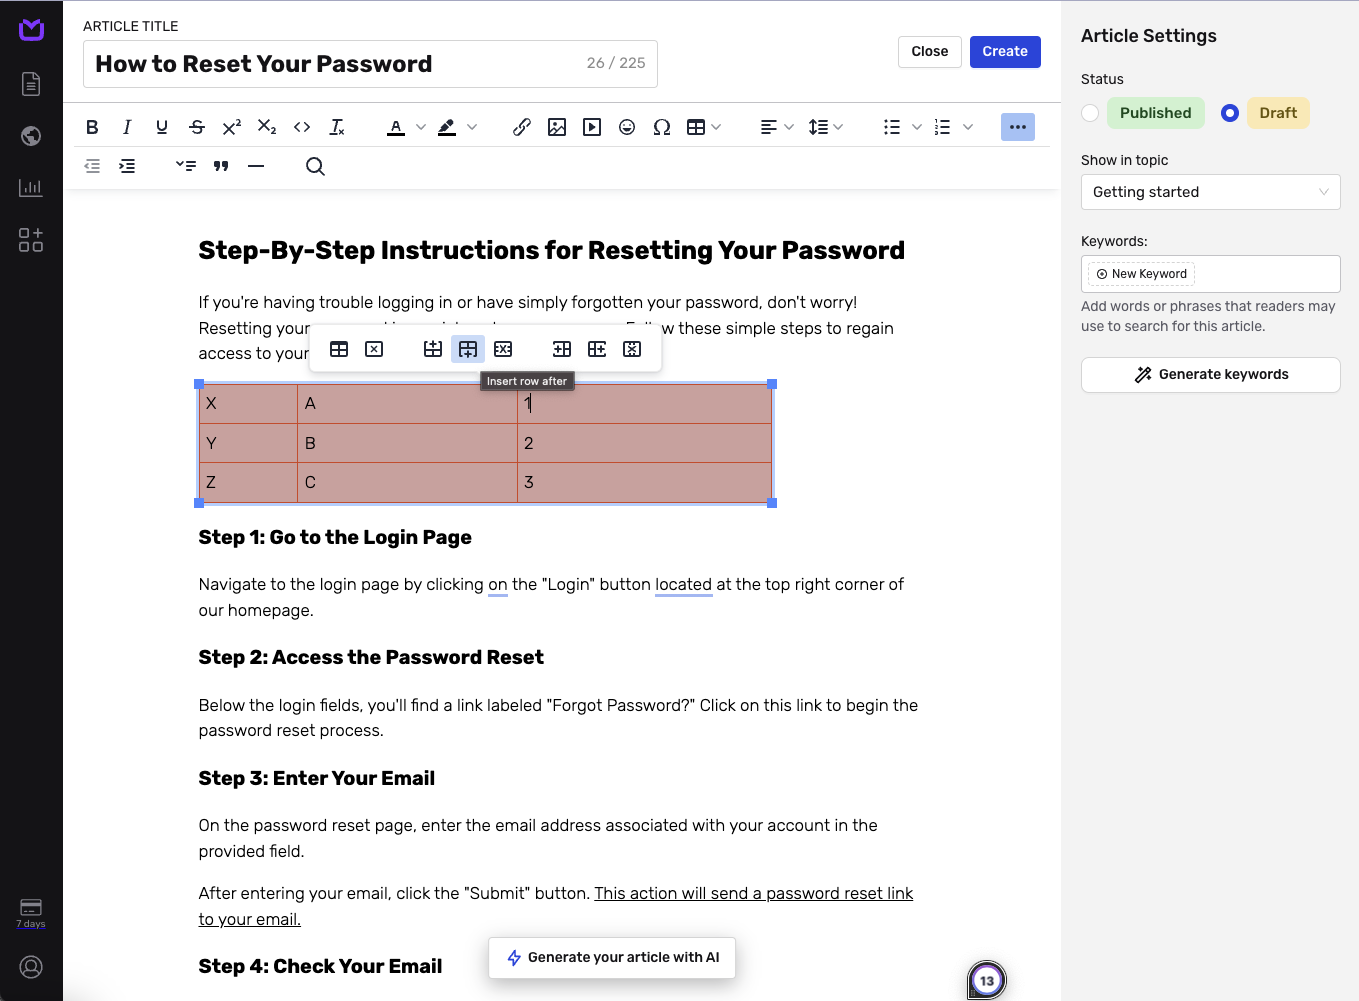
Cells and rows also contain additional general and advanced properties that can be customized. Select a table, click the "table" icon on the toolbar, and select the cell or row properties option.
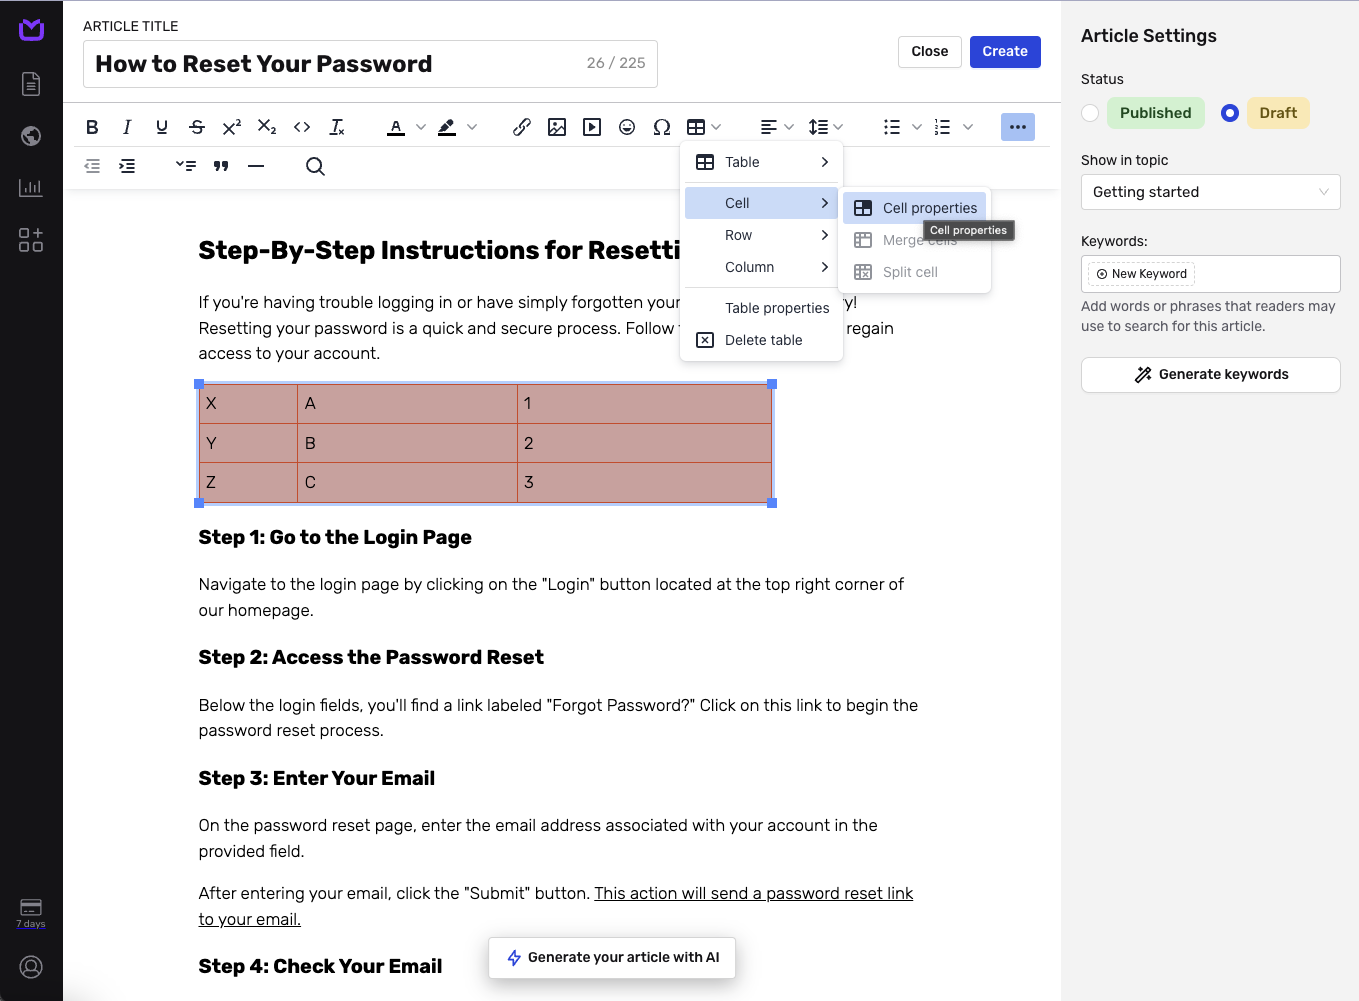
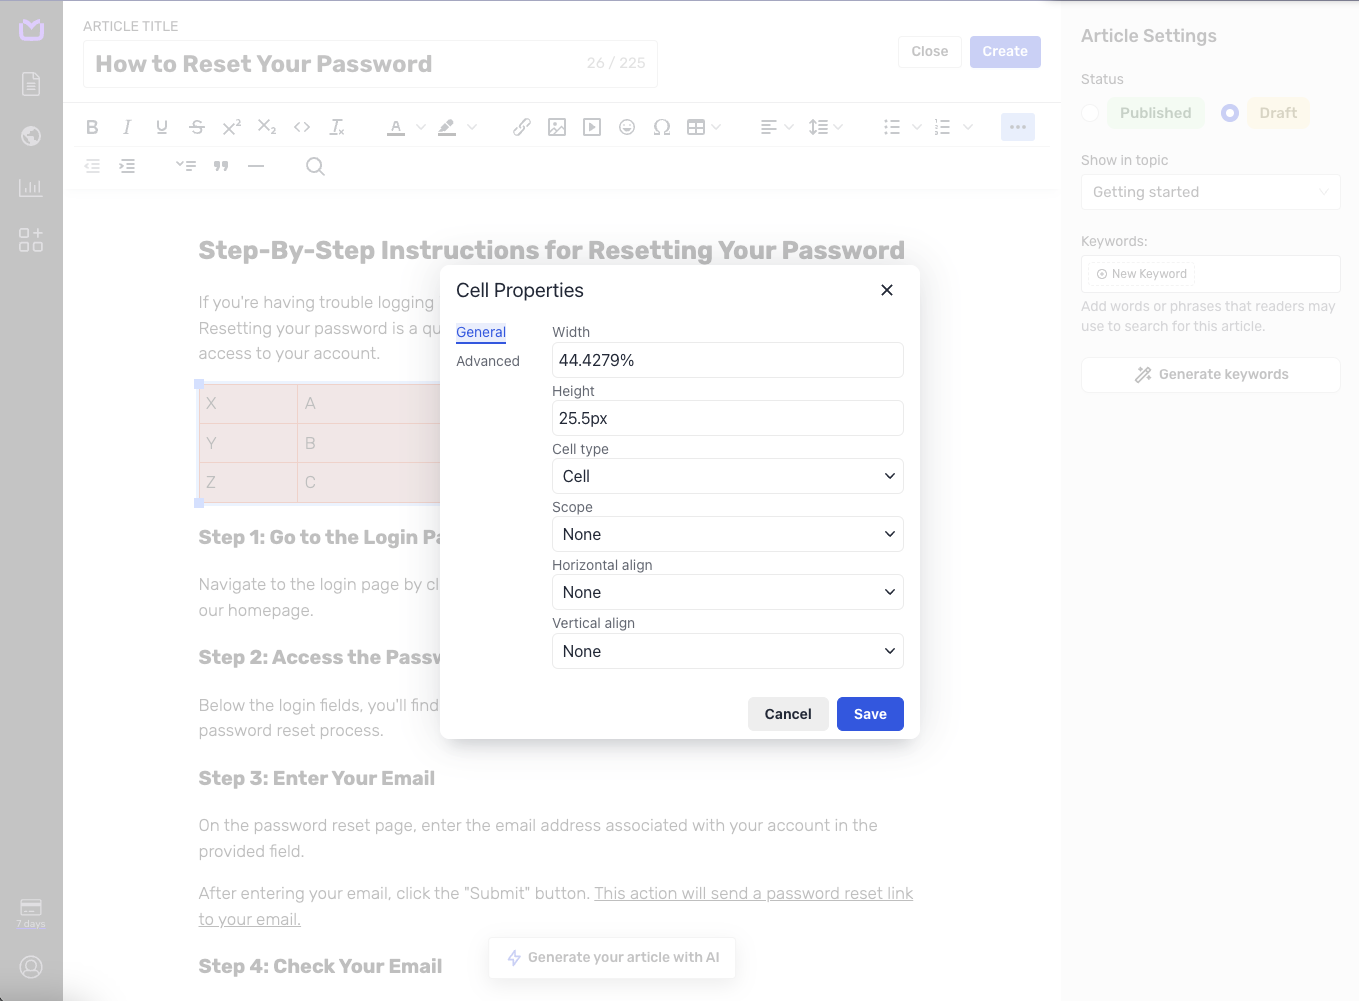
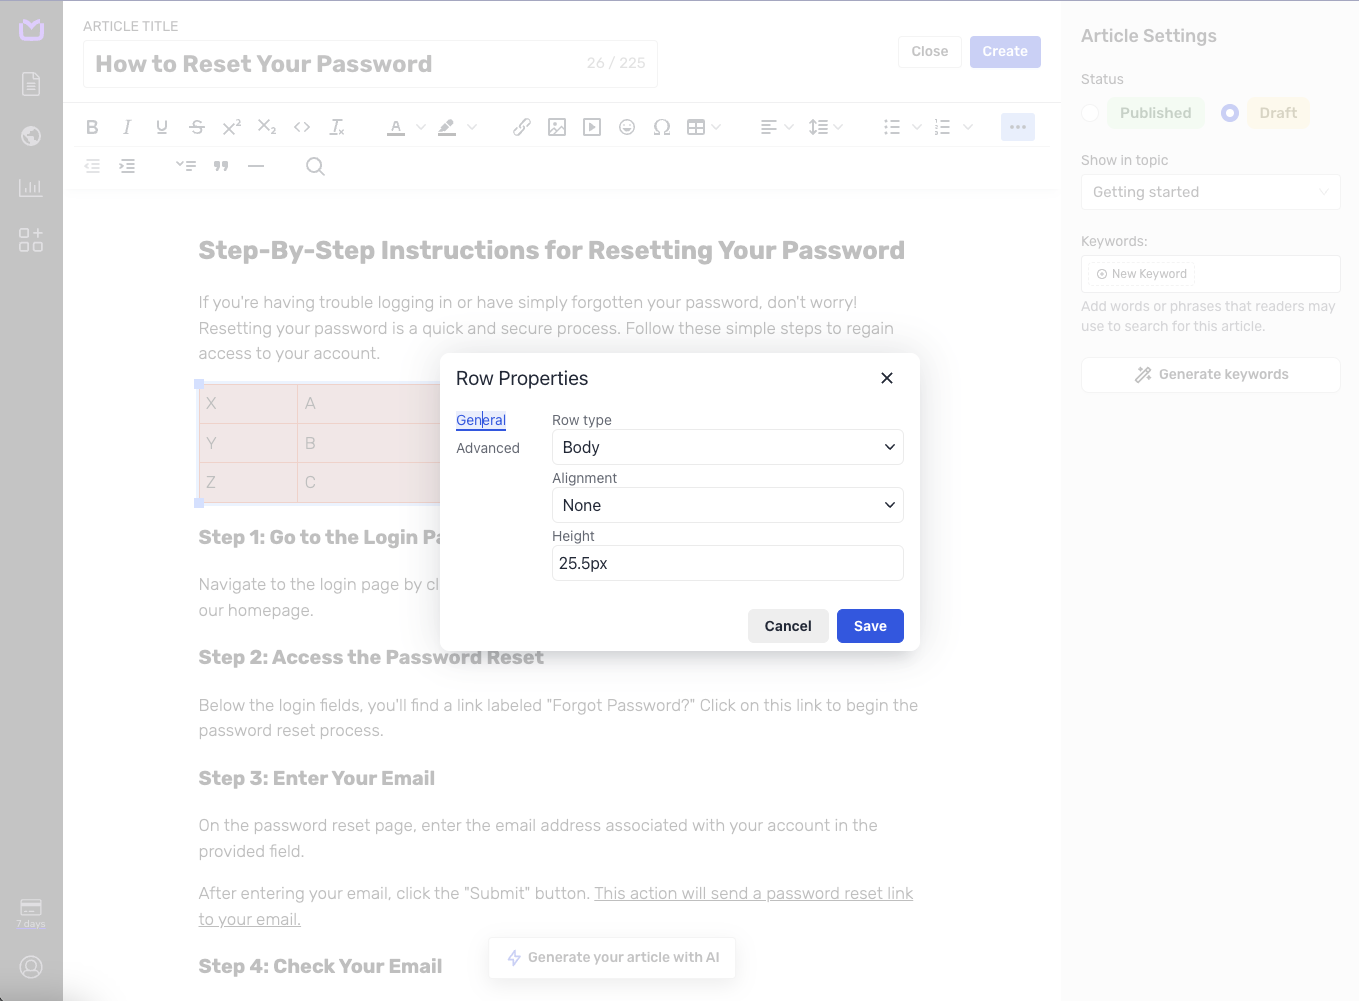
Here, you can change the general and advanced settings to make the table fully functional.
Creating ordered and unordered lists
KnowledgeBase lets you create ordered (1., 2., 3., …) and unordered ( • ) lists.
Creating lists starts just like all other formatting options – by selecting a text fragment and choosing one of the following icons.
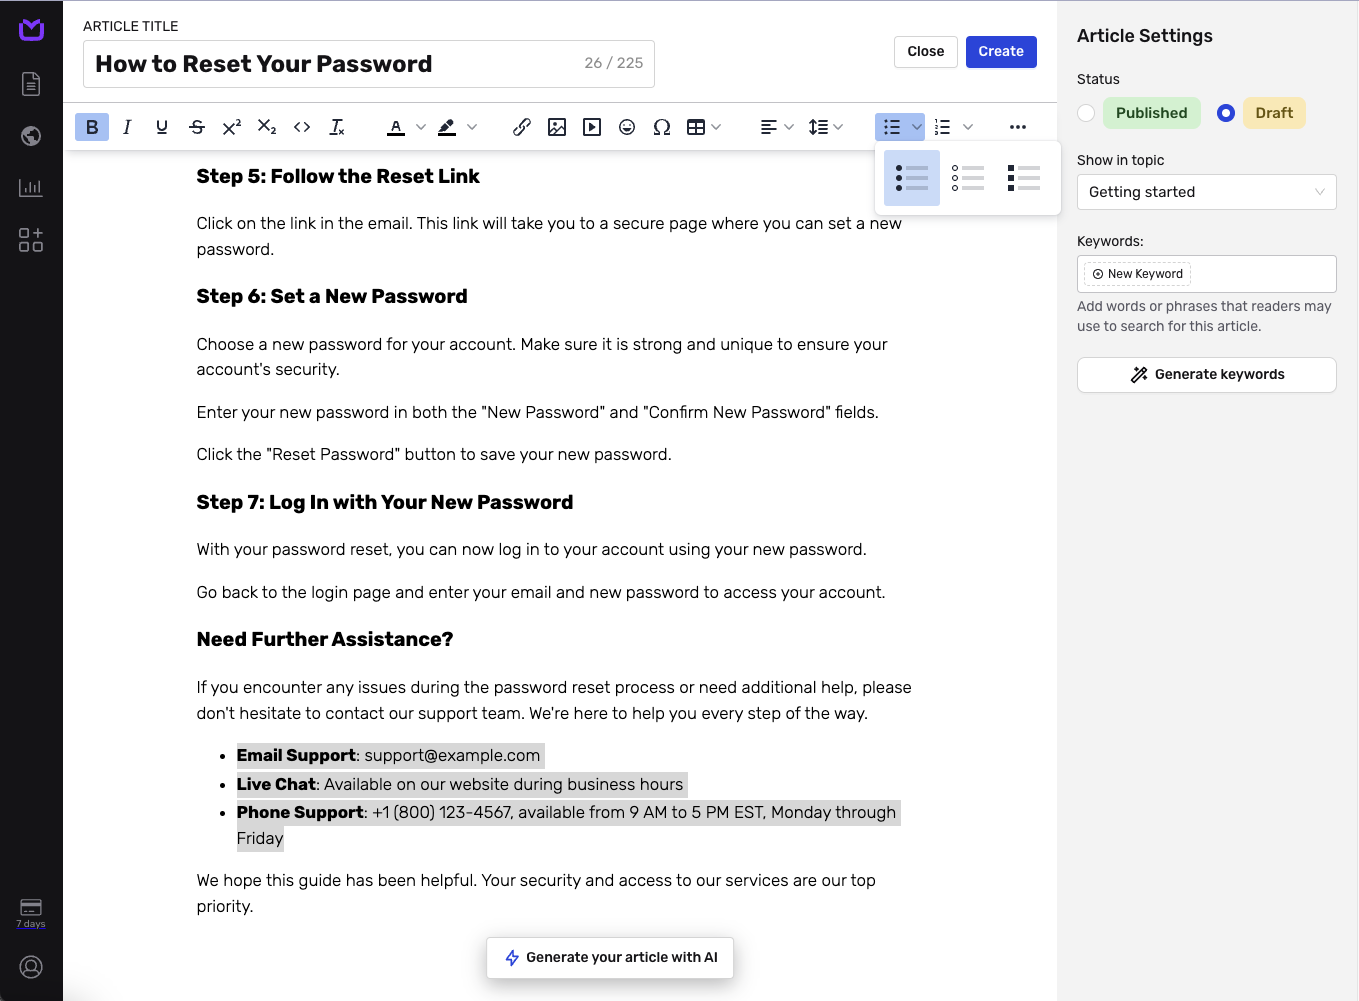
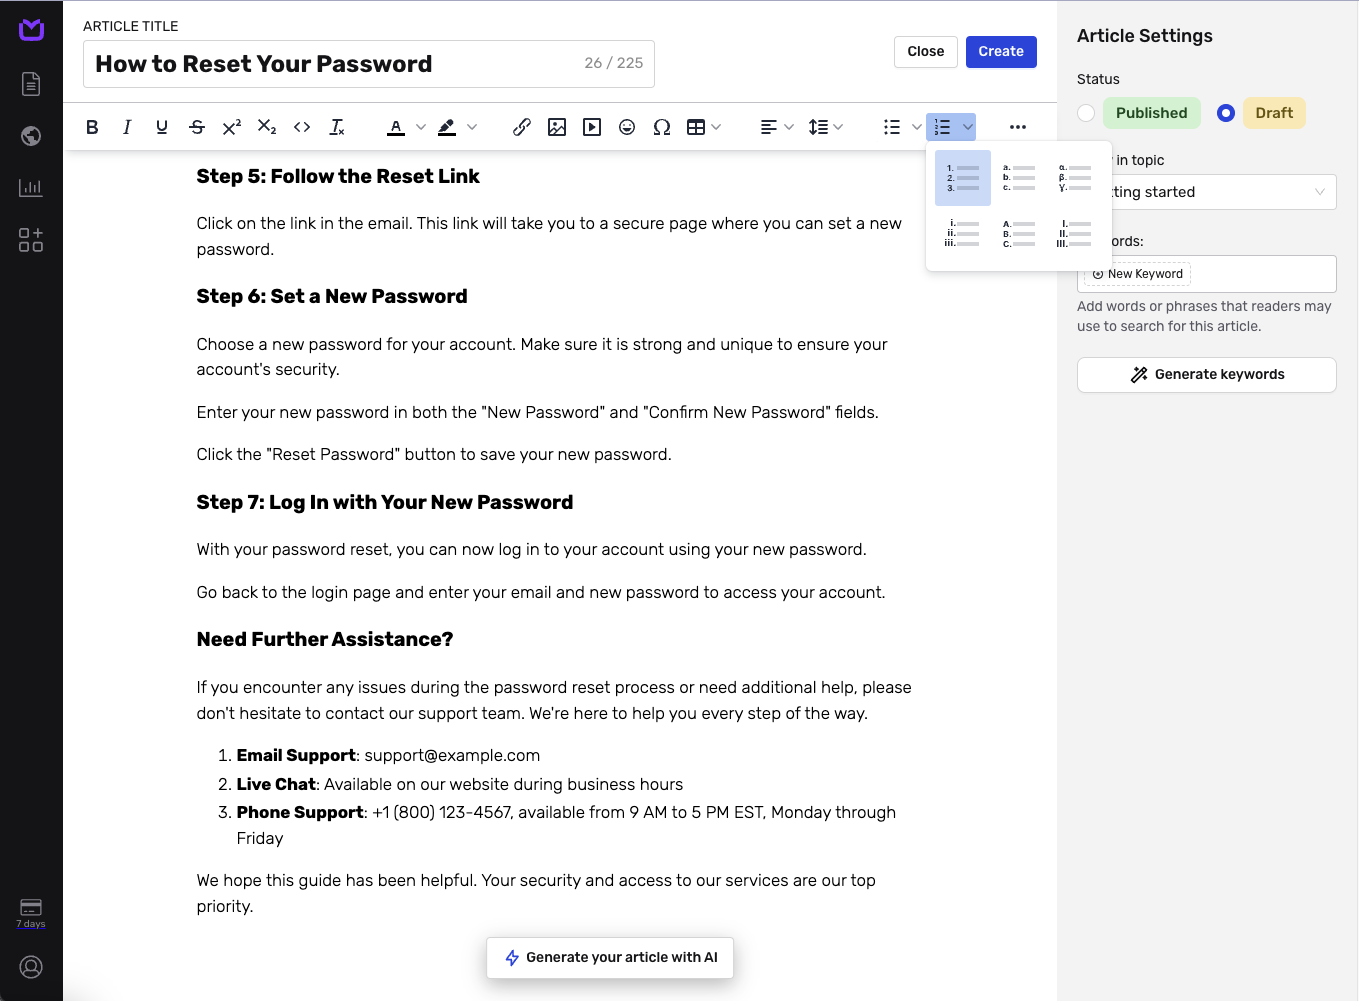
Clicking on any of these icons will make the selected text the first element of the list.
You can now:
-
create a new row by hitting ENTER,
-
increase the indent with the TAB key for up to 4 levels,
-
decrease the indent with the SHIFT+TAB keys,
Or finish the list and go back to text mode by hitting BACKSPACE.
The same rules and short-keys apply to the ordered lists.
Using quotations
Using quotations makes your article more reliable and trustworthy, or helps to highlight a paragraph better.
Quotations are triggered with the Quote icon hidden in the menu, with additional options on the right side of the toolbar.
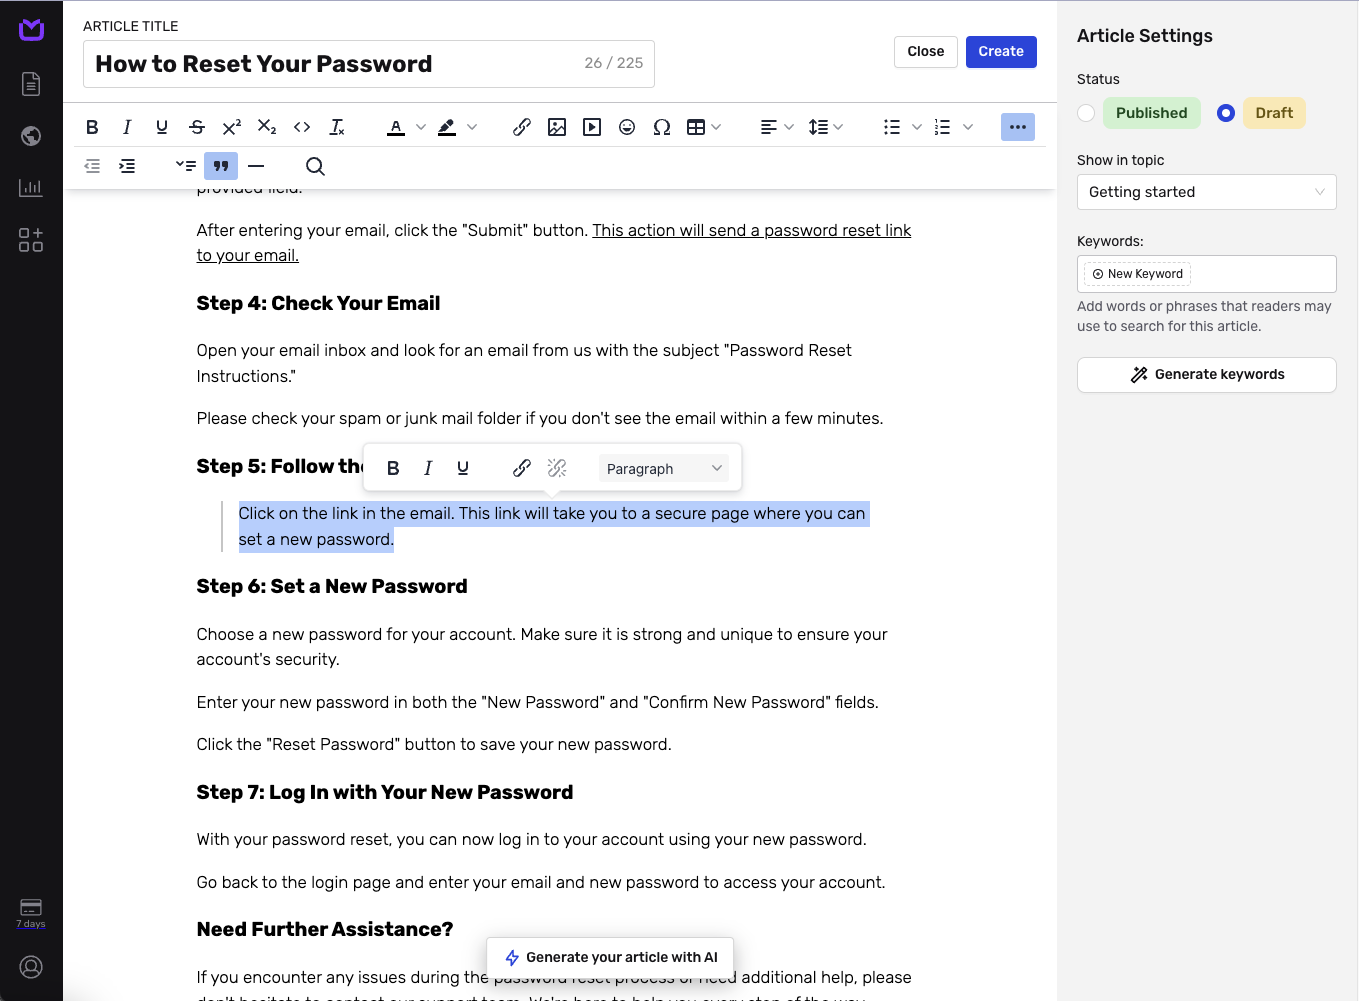
To quote a given sentence, select it and choose the Quote icon from the toolbar.
To delete the quotation, repeat the above process or set your typing indicator at the beginning of the sentence and hit BACKSPACE.